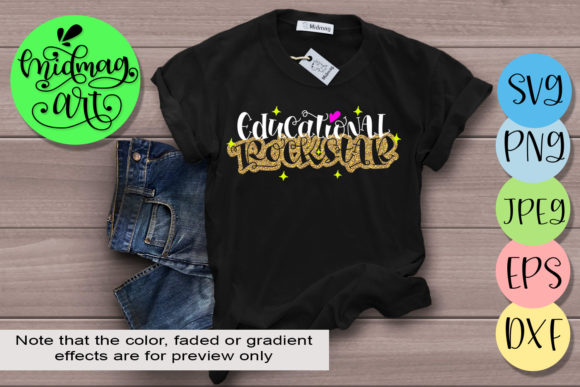
Educational Rockstar: What Nobody Tells You About Buying and Using SVG Files
If you have spent any time browsing digital cut files, you have probably come across the term Educational Rockstar. It sounds like something a proud teacher or a creative parent would grab for a back-to-school project. And honestly, it is exactly that kind of design—playful, motivational, and perfect for classroom decor, teacher gifts, or planner stickers. But here is what most people do not realize: buying a digital file like that is not the same as buying a printed item. It is easy to make mistakes that waste time, ruin materials, or leave you frustrated with a file that will not cut properly.
Let me walk you through the most common pitfalls people encounter when they purchase Educational Rockstar SVG or any back-to-school SVG set. More importantly, I will show you how to avoid those mistakes so you get the results you actually want.
Mistake #1: Assuming All File Formats Are Interchangeable
A typical listing for a design like Educational Rockstar will mention that the zip file contains SVG, DXF, EPS, PNG, and JPEG files. Many beginners see this and think, "Great, I will just open whichever one is easiest." That is where the trouble begins.
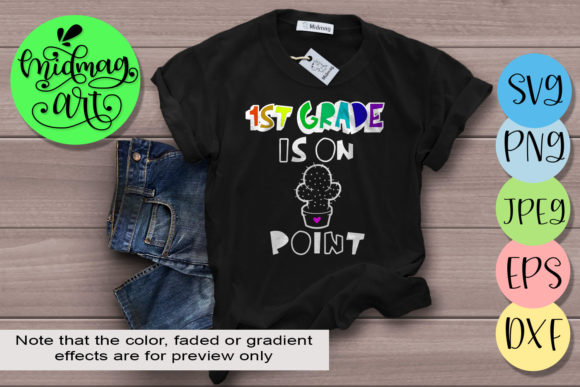
Each format serves a different purpose. The SVG file is ideal for Cricut Explore, Silhouette Designer Edition, Adobe Suite, Inkscape, and Corel Draw. It maintains crisp cut lines and works well with most modern cutting machines. The DXF file is specifically useful for Silhouette users who rely on the free version of Silhouette Studio. The EPS file is built for vector editing in Adobe Illustrator or Inkscape. The PNG file comes with a transparent background at 300 dpi, making it perfect for digital use on websites, social media, or print-on-demand mockups. The JPEG file is high resolution at 300 dpi, suitable for printing but not for cutting.
Here is what happens: someone tries to open a JPEG in their Cricut Design Space, gets frustrated because the software treats it like a photo instead of a cut line, and then assumes the file is broken. It is not broken. It is just the wrong format for the task.
Better approach: Decide what you are making before you download. If you are cutting vinyl or cardstock, reach for the SVG file. If you are designing digitally, use the PNG or EPS. If you are using the free version of Silhouette Studio, grab the DXF. Taking ten seconds to match the format to your project saves you an enormous amount of frustration.
Mistake #2: Ignoring the ZIP File Structure
When you purchase a digital product like Educational Rockstar svg, the files arrive inside a ZIP archive. Some people download the ZIP and try to open the files directly from within the compressed folder. That often causes errors. The software cannot properly read a file that is still compressed, and you end up with broken shapes or missing layers.
Another common oversight: people unzip the folder but then leave all the files scattered across their desktop. Later, they cannot remember which version is the cut file and which is the print file. They accidentally load the wrong one, get a bad cut, and blame the design.
Better approach: Create a dedicated folder on your computer for purchased SVG files. Unzip each purchase into that folder immediately. Name the folder something clear like "Educational Rockstar SVG - Back to School." That way, when you go back to find the file next week, you know exactly where it lives and which format to use.
Mistake #3: Overlooking the DPI and Resolution Details
The listing says the PNG and JPEG files are 300 dpi. That is excellent resolution for printing. But here is where people slip: they assume that because the PNG is high resolution, it will also cut cleanly on a Cricut or Silhouette. It will not. A PNG is a raster image made of pixels. When you try to cut it, the machine sees a flat picture, not a vector path.
I have seen crafters spend hours trying to trace a PNG inside their cutting software, only to end up with jagged edges and extra nodes that make the cut messy. The design itself—Educational Rockstar—might be perfectly fine, but the workflow is working against you.
Better approach: Use the PNG file only for digital mockups, social media posts, or print projects. If you need to cut, always use the SVG or DXF. If you absolutely must convert a PNG to a cut file, use a dedicated vector tracing tool like Inkscape or Adobe Illustrator, and be prepared to clean up the nodes manually. That is extra work that the SVG file already saves you.
Mistake #4: Not Checking Software Compatibility Before Buying
This is a big one. People see a design they love, hit "buy," download the files, and then discover that their software cannot open the format they need. For example, the free version of Silhouette Studio does not open SVG files. It opens DXF and some other formats. So if you buy Educational Rockstar SVG and you only have the free Silhouette Studio, you need to use the DXF file, not the SVG.
Similarly, older versions of Cricut Design Space can sometimes struggle with complex SVG files that have many layers or intricate paths. Beginners may think the file is corrupted when really it is just a software limitation.
Better approach: Before you purchase, check which version of your software you are running. If you are using the free Silhouette Studio, confirm that the listing includes a DXF file. If you are using an older machine or software version, look for reviews from people with similar setups. A quick search for "[your software] Educational Rockstar" can reveal whether others had issues. This simple check saves you from buying something you cannot use.
Mistake #5: Misunderstanding Licensing and Commercial Use
Many small business owners and entrepreneurs buy Educational Rockstar with the intention of selling finished products—like teacher thank-you gifts, classroom signs, or tumblers with the design. That is a valid use, but only if the listing explicitly allows commercial use. Some SVG designers offer personal use only licenses. Others include limited commercial use for small-scale production. A few require an extended license if you plan to sell hundreds of units.
Here is the mistake: assuming all SVG files come with commercial rights. I have seen sellers get hit with takedown notices because they used a design on Etsy without checking the license. That is not just frustrating—it can hurt your shop's reputation and your income.
Better approach: Read the product description carefully. Look for phrases like "personal use only," "commercial use allowed," or "extended license required." If the listing is unclear, message the seller before you buy. When you purchase, save a copy of the license terms in your project folder. That way, if anyone questions your right to use the design, you have proof. This is especially important for products like back-to-school SVG sets that are popular for resale.
Mistake #6: Skipping the Test Cut
You have unzipped the files. You have loaded the SVG into your software. You have perfectly sized the design. You press "go" on your machine—and the cut comes out misaligned, or the letters are too thin, or the details are so small that they tear when you weed them.
This is not necessarily a problem with the Educational Rockstar design. It is a problem with not testing first. Every cutting machine, every blade, every material behaves differently. What works perfectly on standard vinyl might fail on glitter vinyl or cardstock.
Better approach: Always, always do a small test cut first. Use a scrap piece of your material. Cut just one element of the design—maybe a single letter or a small star. If it cuts cleanly and weeds easily, then proceed with the full project. If it does not, adjust your blade depth, pressure, or material settings before you commit to the full cut. This habit alone will save you from wasting expensive materials and hours of frustration.
Mistake #7: Overcomplicating the Design with Unnecessary Modifications
The Educational Rockstar svg is already designed to be eye-catching and functional. But some crafters cannot resist tweaking it—adding extra text, swapping fonts, merging layers they do not fully understand. Before they know it, the design no longer cuts correctly, or the layering gets confused.
There is nothing wrong with customization. The problem is doing it without understanding how the original vector paths are structured. A design that looks simple on screen can have hidden compound paths or overlapping shapes that break when you start moving pieces around.
Better approach: If you are new to vector editing, start with the design as-is. Make your project exactly as shown in the listing. Once you have successfully cut and assembled it once, then experiment with modifications. That way, if something goes wrong, you know the fault is with your changes, not with the original file. Use a copy of the SVG for your experiments, so you always have the original untouched version as a backup.
Mistake #8: Forgetting to Check for Sizing and Aspect Ratio
When you open an SVG in your cutting software, it often imports at the original size the designer created—which might be larger or smaller than what you need. Many people grab the corner handle and drag to resize, not realizing they are distorting the aspect ratio. A design that should be perfectly proportioned ends up looking squished or stretched.
This is especially noticeable with text-heavy designs like Educational Rockstar. If the letters get compressed horizontally, the whole look changes. It no longer feels "rockstar" anymore.
Better approach: Always hold the Shift key (or lock the aspect ratio in your software) when resizing. Better yet, set exact dimensions in inches or centimeters rather than dragging by hand. If you need a specific finished size, like 5 inches wide for a notebook cover, enter that number directly. The software will maintain the proportions automatically if you have the lock icon engaged.
Putting It All Together
A design like Educational Rockstar is a fantastic starting point for back-to-school projects, teacher appreciation gifts, or classroom decorations. The file itself is just raw material. Your success depends on how you handle it—from the moment you hit "download" to the moment you peel the vinyl off the mat.
Here is a quick checklist for next time you buy an SVG set:
- Unzip the folder into a dedicated project directory.
- Select the correct format for your software and machine.
- Check the license terms before you sell anything.
- Test a small piece of your design on scrap material first.
- Resize carefully and maintain the aspect ratio.
- Keep the original file untouched in case you need to start over.
These steps take almost no extra time, but they transform your experience from frustrating to satisfying. You get cleaner cuts, less waste, and a final product that actually looks like the picture you fell in love with. Whether you are a seasoned craft business owner or a parent making something special for the first day of school, that is the real win.